Persinette Crochet Pom Beanie Free Pattern – Stand Up to Bullying
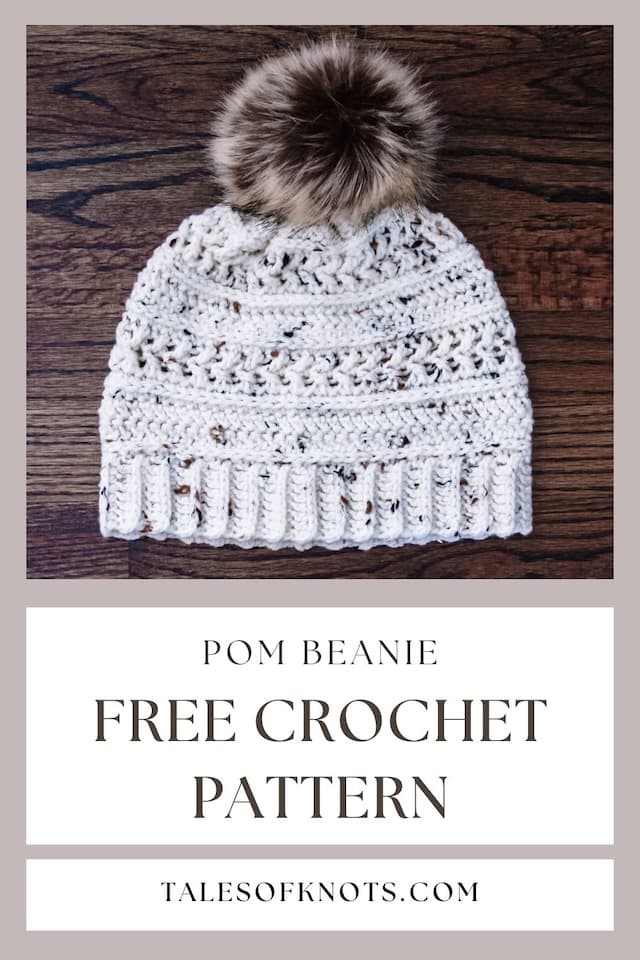
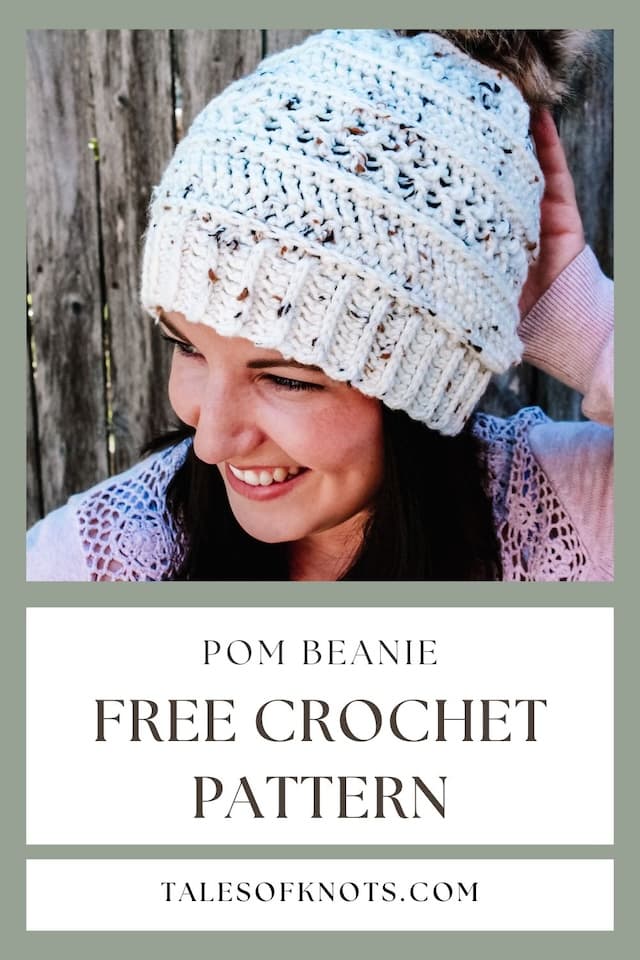
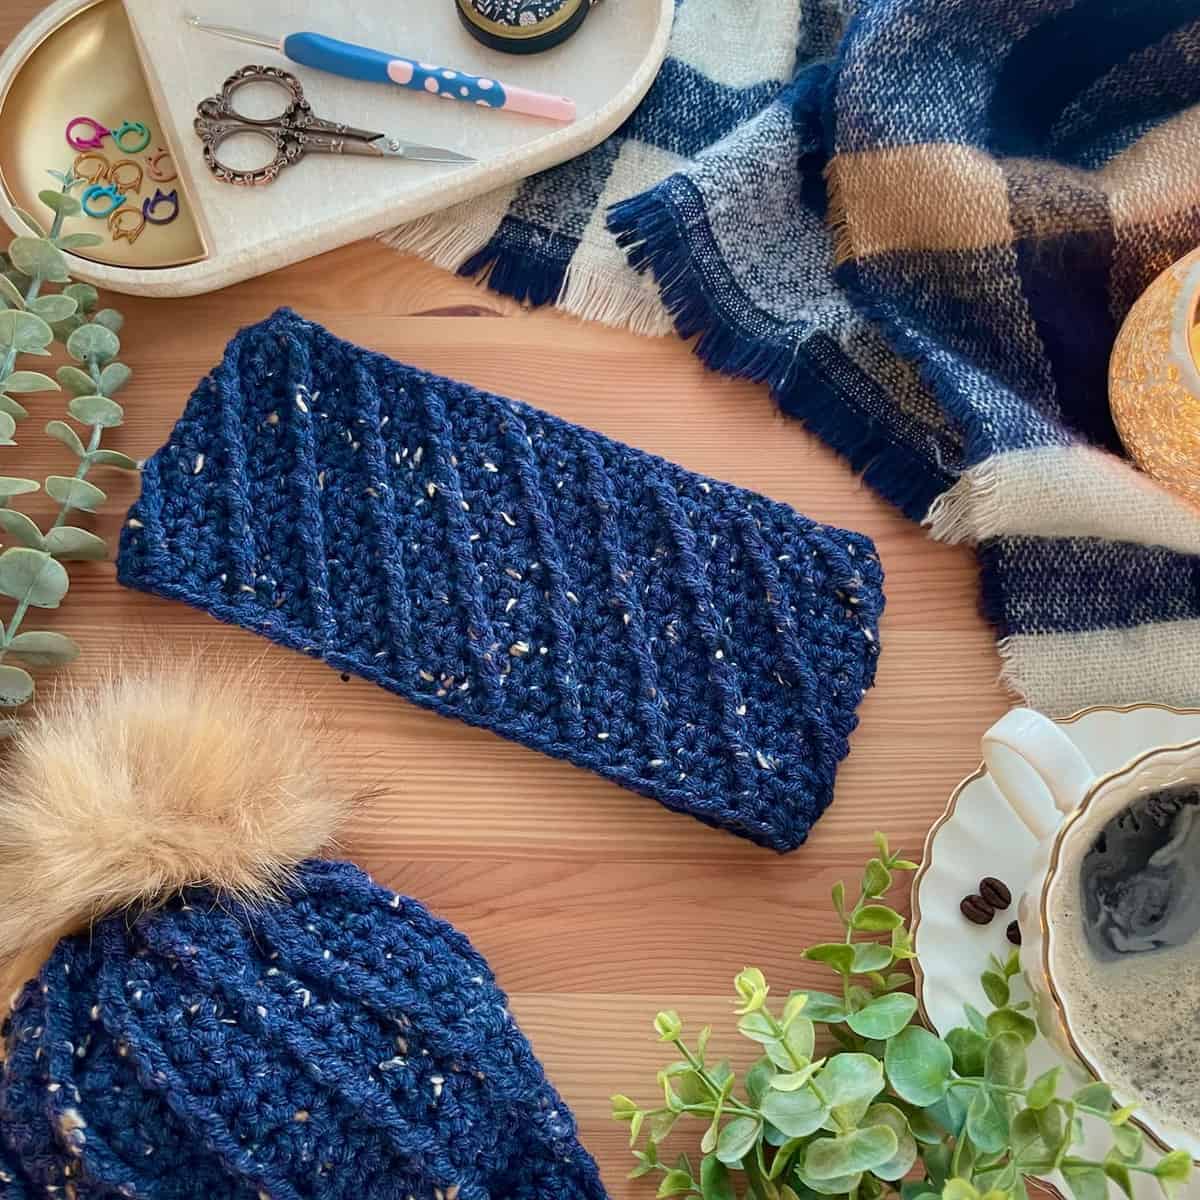
Persinette Beanie | Free Crochet Pattern
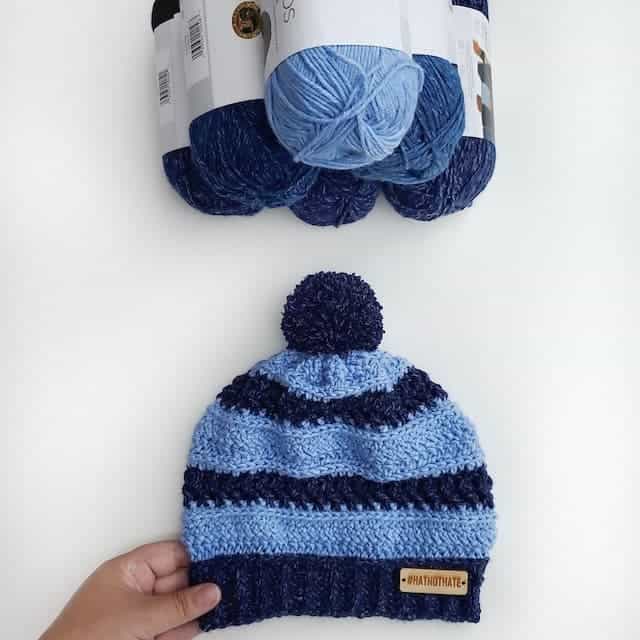
When I was given the opportunity to design a crochet pom beanie as part of a series of designs by the Crochetmous Crew for Hat Not Hate’s anti-bullying campaign, I knew I couldn’t pass it up. If you haven’t heard of it before, October is National Bullying Prevention Month, and members of the knitting and crochet communities make blue hats to be distributed in schools all across the country to empower kids to stand up to bullying.
*Disclosure: This post contains affiliate links, and at no additional cost to you, I may earn a commission if you decide to make a purchase after clicking through the link. Please see my Privacy Policy for full details. Thank you for supporting Tales of Knots!
Hat Not Hate Make-Along
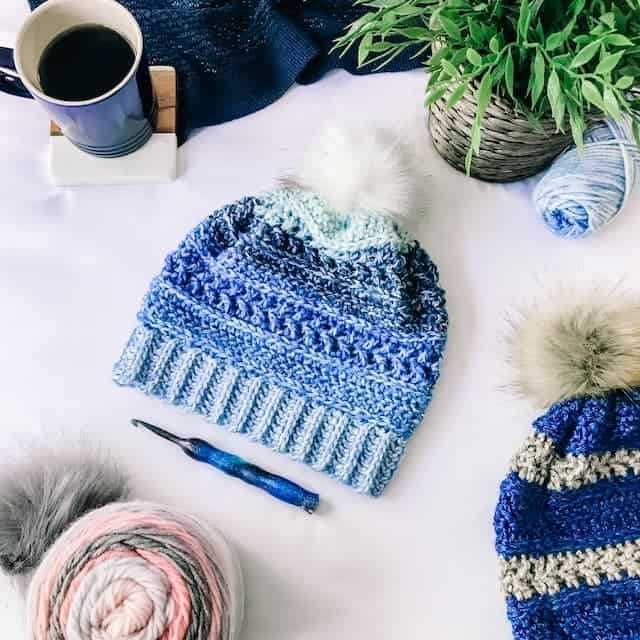
What a fantastic cause! My crew and I organised a Make-A-Long for people who wanted to get involved, releasing a new crochet beanie design each week for members of our Crochetmous Crew facebook group to make along with us, and then contributing them towards a final hat count that will be donated to the campaign. Just grab your hooks and your favourite blue yarn, and get stitching!

Design Inspiration
But first, a little note about Persinette herself.
She is a character from an old french fairytale.
A beautiful girl with long tresses of golden hair, raised and concealed in a tall tower by a fairy… Perhaps you’ve heard of her by another name?
More recently she was brought to life on the big screen in a movie that both my kids and I have watched about a million times! So that her long golden tresses didn’t get all ‘tangled’ up while walking around (see what I did there?!) she enlisted some little girls to put it up in many braids, a style I was immediately reminded of when designing the original version of this beanie.
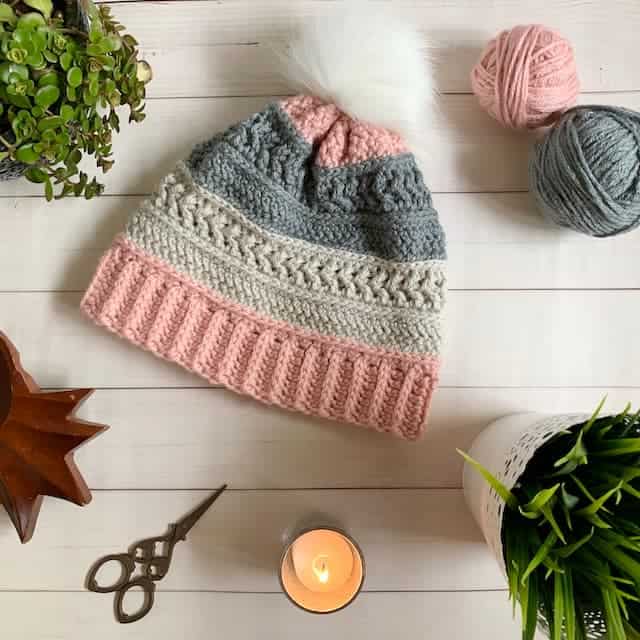
So immerse yourself in a world of fairytales and make a #Persinettebeanie for the little princess in your life, or take some time away from your responsibilities to have some fun whipping up this pattern just for yourself!
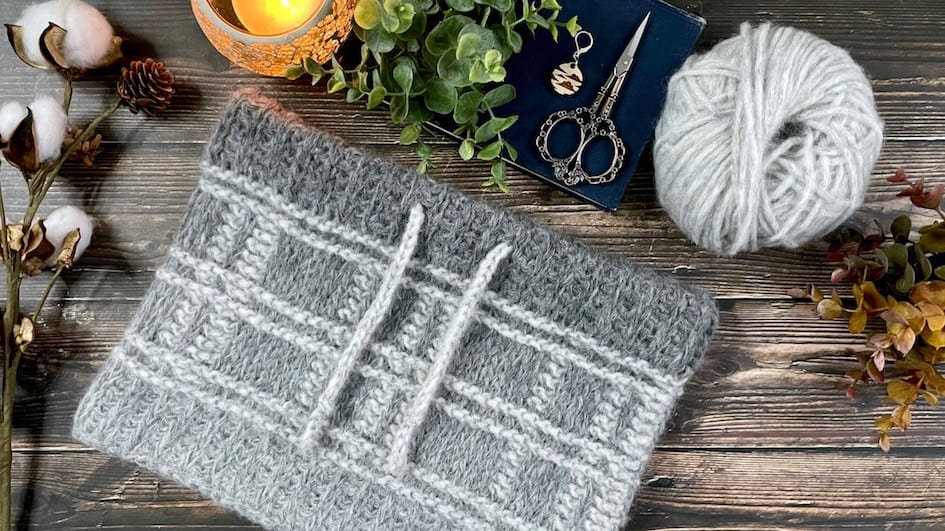
Designed with a slightly slouchy fit, easily customise your new crochet pom beanie by flipping up the brim for a more fitted look. However you style it, I hope that it will remind you every time you wear it to ‘let your hair down’ every once in a while!
Crochet Pom Beanie Supplies:
Yarn:
Medium Worsted (size 4) Lion Brand Heartland in Olympic (color A) and Grand Canyon (color B)
Additional samples made with Loops and Threads Impeccable in Aran Tweed and Hobbii Lollipop Melange in Tampa
Crochet Hooks:
4.5mm (US 7-G+) and 5.5mm (US I-9) We Crochet Dot crochet hook
Notions:
- Yarn needle (for weaving in ends)
- Scissors
- Stitch markers (optional)
- Faux fur detachable pom (optional)
- Small button (for attaching pom – optional)
Yardage:
- Adult Large: 200 yds
- Adult Small/Teen: 175 yds
- Child: 142 yds
- Toddler: 115 yds
- Baby (6-12mos): 90 yds
If using two colors, color A uses approx 75% of yardage specified, color B uses approx 25%.
Skill Level: Intermediate
(Instructions are also given within the pattern for customization options)
Gauge: (worked in flat, turned rows)
Ribbing: (4.5mm hook) 19 sts x 13 rows = 4″ (10cm) in ribbing st pattern – All sizes
Body: (5.5mm hook) Both Adults and Toddler – 14 sts x 8 rows = 4″ (10cm) in body st pattern Child and Baby – 14 sts x 10.5 rows = 4″ (10cm) in body st pattern
Abbreviations:
- Ch(s) = Chain(s)
- St(s) = Stitch(es)
- Sl St = Slip stitch
- Inv sl st = Invisible slip stitch
- Sk st = Skip specified stitch
- YO = Yarn over
- Sc = Single crochet
- Hdc = Half double crochet
- Dc = Double crochet
- 3L = Work stitches in third loop of hdc
- HBhdc = Herringbone hdc
- HBdc = Herringbone dc
- HBhdc2tog = Herringbone hdc two together
- HBdc2tog = Herringbone dc two together
- FXdc – Front cross dc
- BXdc – Back cross dc
- RS = Right side
- WS = Wrong side
- (#) = Number of stitches per row/round
Finished Measurements:
- Adult Large (to fit 22-24″) = 20″ around by 9″ tall
- Adult Small/Teen (to fit 20-22″) = 18″ around by 9″ tall
- Child (to fit 18-20″) = 16″ around by 8″ tall
- Toddler (to fit 16-18″) = 15″ around by 7″ tall
- Baby (6-12mos to fit 14-16″) = 13″ around by 6″ tall
Special Stitches:
(Grab your copy of the pdf for full photo tutorials of the below stitches)
Working in third Loop (3L) – When working a half double crochet stitch, the YO before inserting the hook creates a ‘third loop’ behind the back loop of the top ‘V’ of the finished stitch. This loop is where you work into in the following row. (This will be on the front as you work the Brim and WS Body rows, however this will be on the back as you work RS Body rows.)
Invisible slip stitch – Extend the working loop on your hook, and remove your hook. Insert the hook from back to front under the top two loops of the first stitch of the round. Place your working loop back on your hook and pull through to the back. Tighten the stitch
Herringbone half double crochet – YO, insert your hook into the next stitch and pull up a loop. Pull the first loop now on your hook through the second loop. (Holding the bottom of the stitch while you do this makes it easier.) YO and pull through two loops.
Herringbone double crochet – YO, insert your hook into the next stitch and pull up a loop. Pull the first loop now on your hook through the second loop. YO, pull through one loop, YO and pull through two loops.
Herringbone half double crochet two together – [YO, insert your hook into the next stitch and pull up a loop. Pull the first loop now on your hook through the second loop] twice. YO and pull through all three loops.
Herringbone double crochet two together – [YO, insert your hook into the next stitch and pull up a loop. Pull the first loop now on your hook through the second loop, YO and pull through one loop] twice. YO and pull through all three loops.
Front cross double crochet (modified X-stitch) – YO, and crossing your hook in front of the dc just worked, insert your hook from back to front into the skipped st. YO and pull up a loop. YO and pull through two loops, YO and pull through two loops.
Back cross double crochet (modified X-stitch) – YO, and crossing your hook behind the dc just worked, insert your hook from front to back into the skipped st. YO and pull up a loop. YO and pull through two loops, YO and pull through two loops.
Persinette Beanie Pattern Notes:
Pattern is written in US terms.
Chains at the beginning of a row/round do not count as the first stitch, unless otherwise specified.
[ ] = Instructions within brackets are worked the total number of times specified.
Where there are no stitch counts listed, the counts are the same as the previous row/round.
If using two colors, the new color is added on the yarn over that completes the joining slip stitch of the previous row.
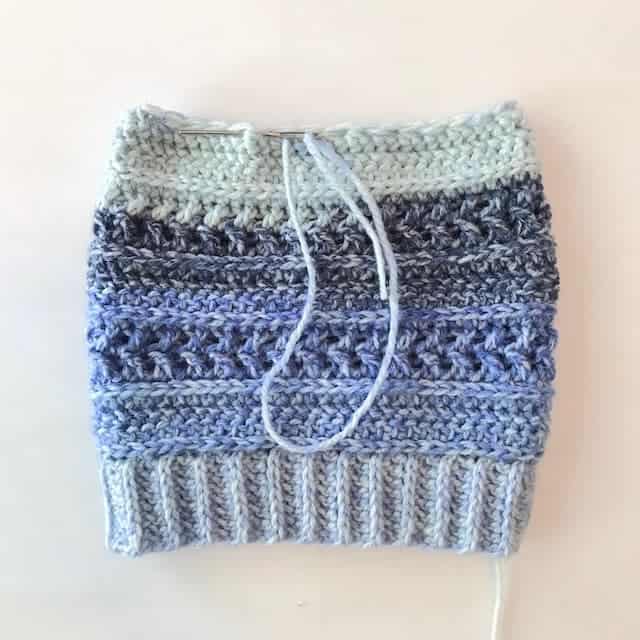
Brim is worked in turned rows first and joined to form a band. It is then turned 90 degrees, in order to continue working the body in joined rounds into the ends of the ribbing rows.
The Brim pattern applies to all sizes; with instructions written first for Adult Large, and subsequent sizes in parentheses. (Adult Small/Teen, Child, Toddler, Baby)
Body pattern is separated out into individual sizes; first pattern is for size Adult Large, followed by sizes Adult Small/Teen, Child, Toddler and Baby respectively.
Customization
If you prefer a fitted hat style, but without a double brim, then simply omit Rounds 2, 3 and 4 from the Body section of sizes Adult Large, Adult Small/Teen and Child, (first time through only) and Rounds 2, 3, 4 and 5 from the Body section of sizes Toddler and Baby (first time through only).
Beanie Pattern Instructions:
Brim – all sizes
With 4.5mm hook and color A
Round 3: RS facing. Turn, ch 2, 1 HBdc in each st around. Join with sl st to first HBdc.
Round 4: RS facing. Ch 1, 1 hdc in each st around. Join with inv sl st to first hdc.
Round 5: working in third loop, RS facing. Ch 1, 1 sc 3L in each st around. Join with sl st to first sc.
If using two colors, change to color B.
Round 6: RS facing. Ch 2, [sk 1, 1 dc in next. 1 FXdc in skipped st] 36 times. Join with sl st to first dc. (36 X-st pairs)
Round 7: RS facing. Ch 2, [sk 1, 1 dc in next. 1 BXdc in skipped st] 36 times. Join with sl st to first dc.
If using two colors, change to color A.
Round 8: RS facing. Ch 1, 1 hdc in each st around. Join with inv sl st to first hdc. (72)
Rounds 9-15: Repeat rounds 2-8.
Rounds 16-17: Repeat rounds 2-3.
Round 18: WS facing. Turn, ch 2, [1 HBdc2tog over two sts] 36 times. Join with sl st to first HBdc2tog. (36 HBdc2tog)
Fasten off, leaving 20 inch tail.
Go to Finishing Section.
Body – Adult Small/Teen
Round 1: RS facing. Beginning in end of joining sl st row of ribbing just completed. Ch 1, [1 hdc in each of next 5 sts, 2 hdc in next] 10 times. Join with inv sl st to first hdc. (70)
Round 2: working in third loop, WS facing. Turn, ch 2, 1 HBdc 3L in each st around. Join with sl st to first HBdc.
Round 3: RS facing. Turn, ch 2, 1 HBdc in each st around. Join with sl st to first HBdc.
Round 4: RS facing. Ch 1, 1 hdc in each st around. Join with inv sl st to first hdc.
Round 5: working in third loop, RS facing. Ch 1, 1 sc 3L in each st around. Join with sl st to first sc.
If using two colors, change to color B.
Round 6: RS facing. Ch 2, [sk 1, 1 dc in next. 1 FXdc in skipped st] 35 times. Join with sl st to first dc. (35 X-st pairs)
Round 7: RS facing. Ch 2, [sk 1, 1 dc in next. 1 BXdc in skipped st] 35 times. Join with sl st to first dc.
If using two colors, change to color A.
Round 8: RS facing. Ch 1, 1 hdc in each st around. Join with inv sl st to first hdc. (70)
Rounds 9-15: Repeat rounds 2-8.
Rounds 16-17: Repeat rounds 2-3.
Round 18: WS facing. Turn, ch 2, [1 HBdc2tog over two sts] 35 times. Join with sl st to first HBdc2tog. (35 HBdc2tog)
Fasten off, leaving 20 inch tail.
Go to Finishing Section.
Body – Child
Round 1: RS facing. Beginning in end of joining sl st row of ribbing just completed. Ch 1, [1 hdc in each of next 5 sts, 2 hdc in next, 1 hdc in each of next 6 sts, 2 hdc in next] 4 times. Join with inv sl st to first hdc. (60)
Round 2: working in third loop, WS facing. Turn, ch 1, 1 HBhdc 3L in each st around. Join with sl st to first HBhdc.
Round 3: RS facing. Turn, ch 1, 1 HBhdc in each st around. Join with sl st to first HBhdc.
Round 4: RS facing. Ch 1, 1 hdc in each st around. Join with inv sl st to first hdc.
Round 5: working in third loop, RS facing. Ch 1, 1 sc 3L in each st around. Join with sl st to first sc.
If using two colors, change to color B.
Round 6: RS facing. Ch 2, [sk 1, 1 dc in next. 1 FXdc in skipped st] 30times. Join with sl st to first dc. (30 X-st pairs)
Round 7: RS facing. Ch 2, [sk 1, 1 dc in next. 1 BXdc in skipped st] 30 times. Join with sl st to first dc.
If using two colors, change to color A.
Round 8: RS facing. Ch 1, 1 hdc in each st around. Join with inv sl st to first hdc. (60)
Rounds 9-15: Repeat rounds 2-8.
Rounds 16-17: Repeat rounds 2-3.
Round 18: WS facing. Turn, ch 1, [1 HBhdc2tog over two sts] 30 times. Join with sl st to first HBhdc2tog. (30 HBhdc2tog)
Fasten off, leaving 20 inch tail.
Go to Finishing Section.
Body – Toddler
Round 1: RS facing. Beginning in end of joining sl st row of ribbing just completed. Ch 1, [1 hdc in each of next 9 sts, 2 hdc in next] 5 times. Join with inv sl st to first hdc. (55)
Round 2: working in third loop, RS facing. Ch 1, 1 sc 3L in each st around. Join with sl st to first sc.
If using two colors, change to color B.
Round 3: RS facing. Ch 3 (counts as first dc), [sk 1, 1 dc in next. 1 FXdc in skipped st] 27 times. Join with sl st to first dc. (27 X-st pairs/1 dc)
Round 4: RS facing. Ch 3 (counts as first dc), [sk 1, 1 dc in next. 1 BXdc in skipped st] 27 times. Join with sl st to first dc.
If using two colors, change to color A.
Round 5: RS facing. Ch 1, 1 hdc in each st around. Join with inv sl st to first hdc. (55)
Round 6: working in third loop, WS facing. Turn, ch 2, 1 HBdc 3L in each st around. Join with sl st to first HBdc.
Round 7: RS facing. Turn, ch 2, 1 HBdc in each st around. Join with sl st to first HBdc.
Round 8: RS facing. Ch 1, 1 hdc in each st around. Join with inv sl st to first hdc.
Rounds 9-13: Repeat rounds 2-6.
Round 14: RS facing. Turn, ch 3 (counts as first HBdc), [1 HBdc2tog over next two sts] 27 times. Join with sl st to first HBdc. (27 HBdc2tog/1 HBdc)
Fasten off, leaving 20 inch tail.
Go to Finishing Section.
Body – Baby (6-12mos)
Round 1: RS facing. Beginning in end of joining sl st row of ribbing just completed. Ch 1, [1 hdc in each of next 5 sts, 2 hdc in next] 7 times. Join with inv sl st to first hdc. (49)
Round 2: working in third loop, RS facing. Ch 1, 1 sc 3L in each st around. Join with sl st to first sc.
If using two colors, change to color B.
Round 3: RS facing. Ch 3 (counts as first dc), [sk 1, 1 dc in next. 1 FXdc in skipped st] 24 times. Join with sl st to first dc. (24 X-st pairs/1 dc)
Round 4: RS facing. Ch 3 (counts as first dc), [sk 1, 1 dc in next. 1 BXdc in skipped st] 24 times. Join with sl st to first dc.
If using two colors, change to color A.
Round 5: RS facing. Ch 1, 1 hdc in each st around. Join with inv sl st to first hdc. (49)
Round 6: working in third loop, WS facing. Turn, ch 1, 1 HBhdc 3L in each st around. Join with sl st to first HBhdc.
Round 7: RS facing. Turn, ch 1, 1 HBhdc in each st around. Join with sl st to first HBhdc.
Round 8: RS facing. Ch 1, 1 hdc in each st around. Join with inv sl st to first hdc.
Rounds 9-11: Repeat rounds 2-4.
Round 12: RS facing. Ch 2 (counts as first HBhdc), [1 HBdc2tog over next two sts] 24 times. Join with sl st to first HBhdc. (24 HBhdc2tog/1 HBhdc)
Fasten off, leaving 20 inch tail. Proceed to Finishing.
Finishing your crochet pom beanie – all sizes
Thread your yarn needle with the long tail and weave in and out of the sts of the final round of your hat.
Pull the yarn tight to cinch the top closed.
Pass the needle through to the WS and turn your hat inside out. Secure the top with a few sts across the closure in different directions, and then fasten off and weave in all ends. If using the detachable poms, sew your small button on here on the WS over the closure.
Turn your hat right side out and then add a pom if desired. If using the detachable pom suggested, use a small crochet hook to pull the little elastic loop through the top of the hat to the WS and loop it over the button you have added.
That’s it!
I’d love to see your finished makes! Please tag me on your favourite social media platform and use the tags @talesofknots and #persinettebeanie so that I can see and share your lovely crochet pom beanie!
I hope you enjoyed making this pattern, and please don’t hesitate to reach out to me if you have any questions.

Need any help with this pattern?
Submit your question in our contact form below!

What a beautiful hat! Thank you for the free pattern. I love to crochet hats and baby booties. This will be a pattern I try for myself. Thanks again!
Thank you very much and I am so glad you love it!
Love this! I make jewelry (even crochet jewelry) and have been wanting to find a cause to create handmade jewelry pieces to donate. You give me the inspiration to create a foundation as I am typing this comment. So thank you for this post. Very inspiring.
Wow that’s amazing! I am so honoured to have contributed to that even in part, what a wonderful idea! Please come back and let me know when it’s set up and if I can support in any way!
I love to crochet and have always wanting an easy follow along for hats. I’m definitely bookmarking your page and checking this out.
Thank you so much, I’m glad you like it!
Love these hats! I crochet a little bit and would love to give it a try. I am in need of a new winter beanie. 🙂 It’s so great that you also included the pattern as well. Thank you!
Hi Lisa! I’m so happy that you’d love to try this! It’s classed as an intermediate pattern as there are a few special stitches; make sure you click the link for the free PDF download from Ravelry, which has full photo tutorials for those stitches if you need them!
Awe, super cute! I’m going to have to make one for my daughter as her last hat I made didn’t survive the move! Thanks for the cute pattern!
You’re welcome! I hope your daughter loves it too!
I absolutely love this design! I have made several to donate and one for myself and they are all so gorgeous. I really appreciate that you offer this pattern for free on your blog! I know how much work goes into creating and testing a pattern.
Thank you so much Ashley! Your support of my business and my family mean the world to me!