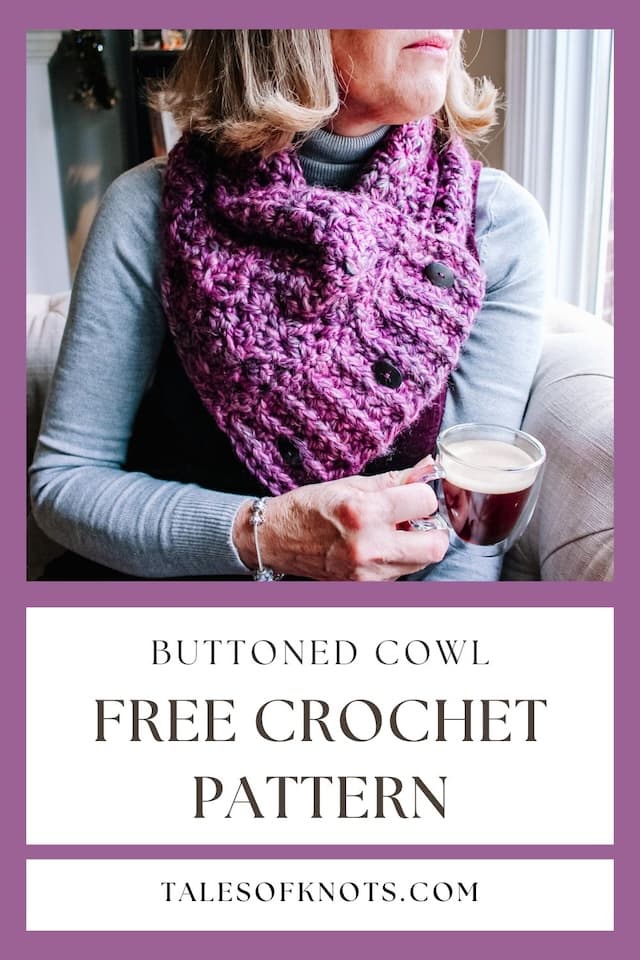
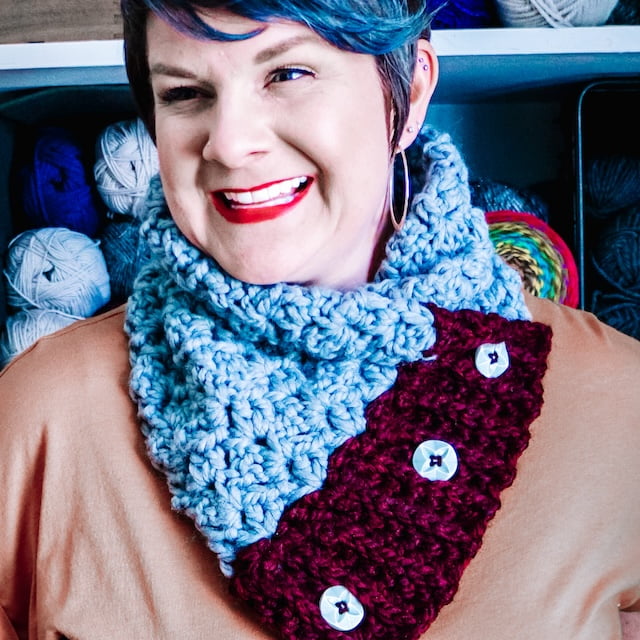
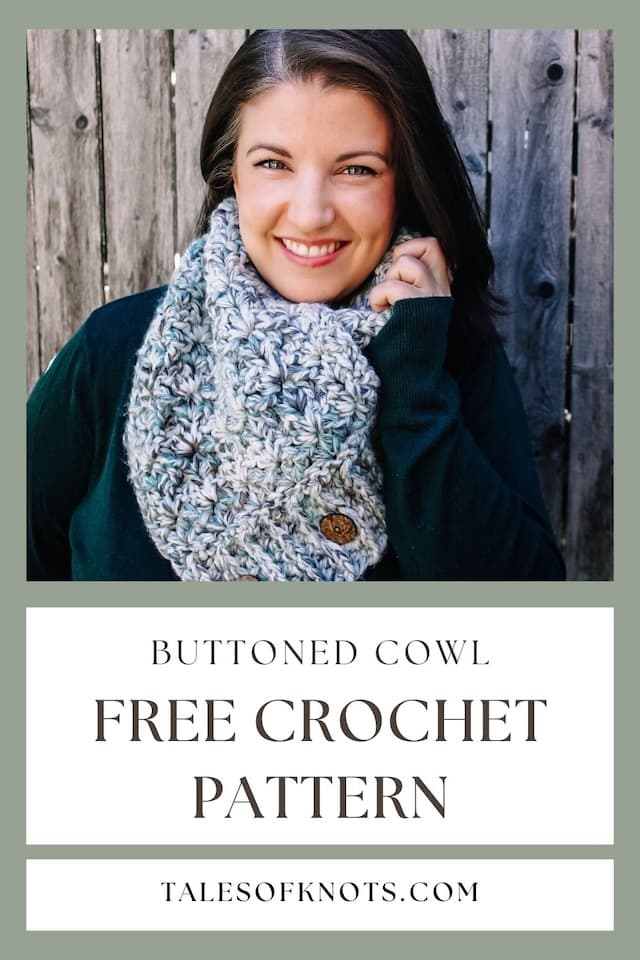
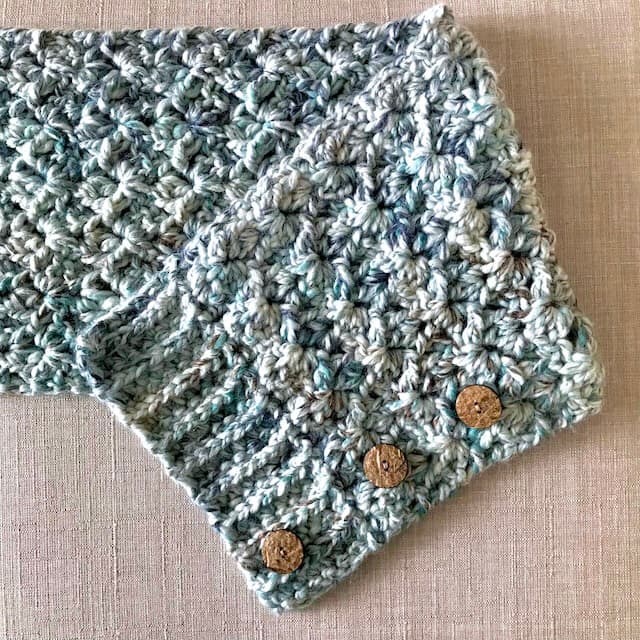
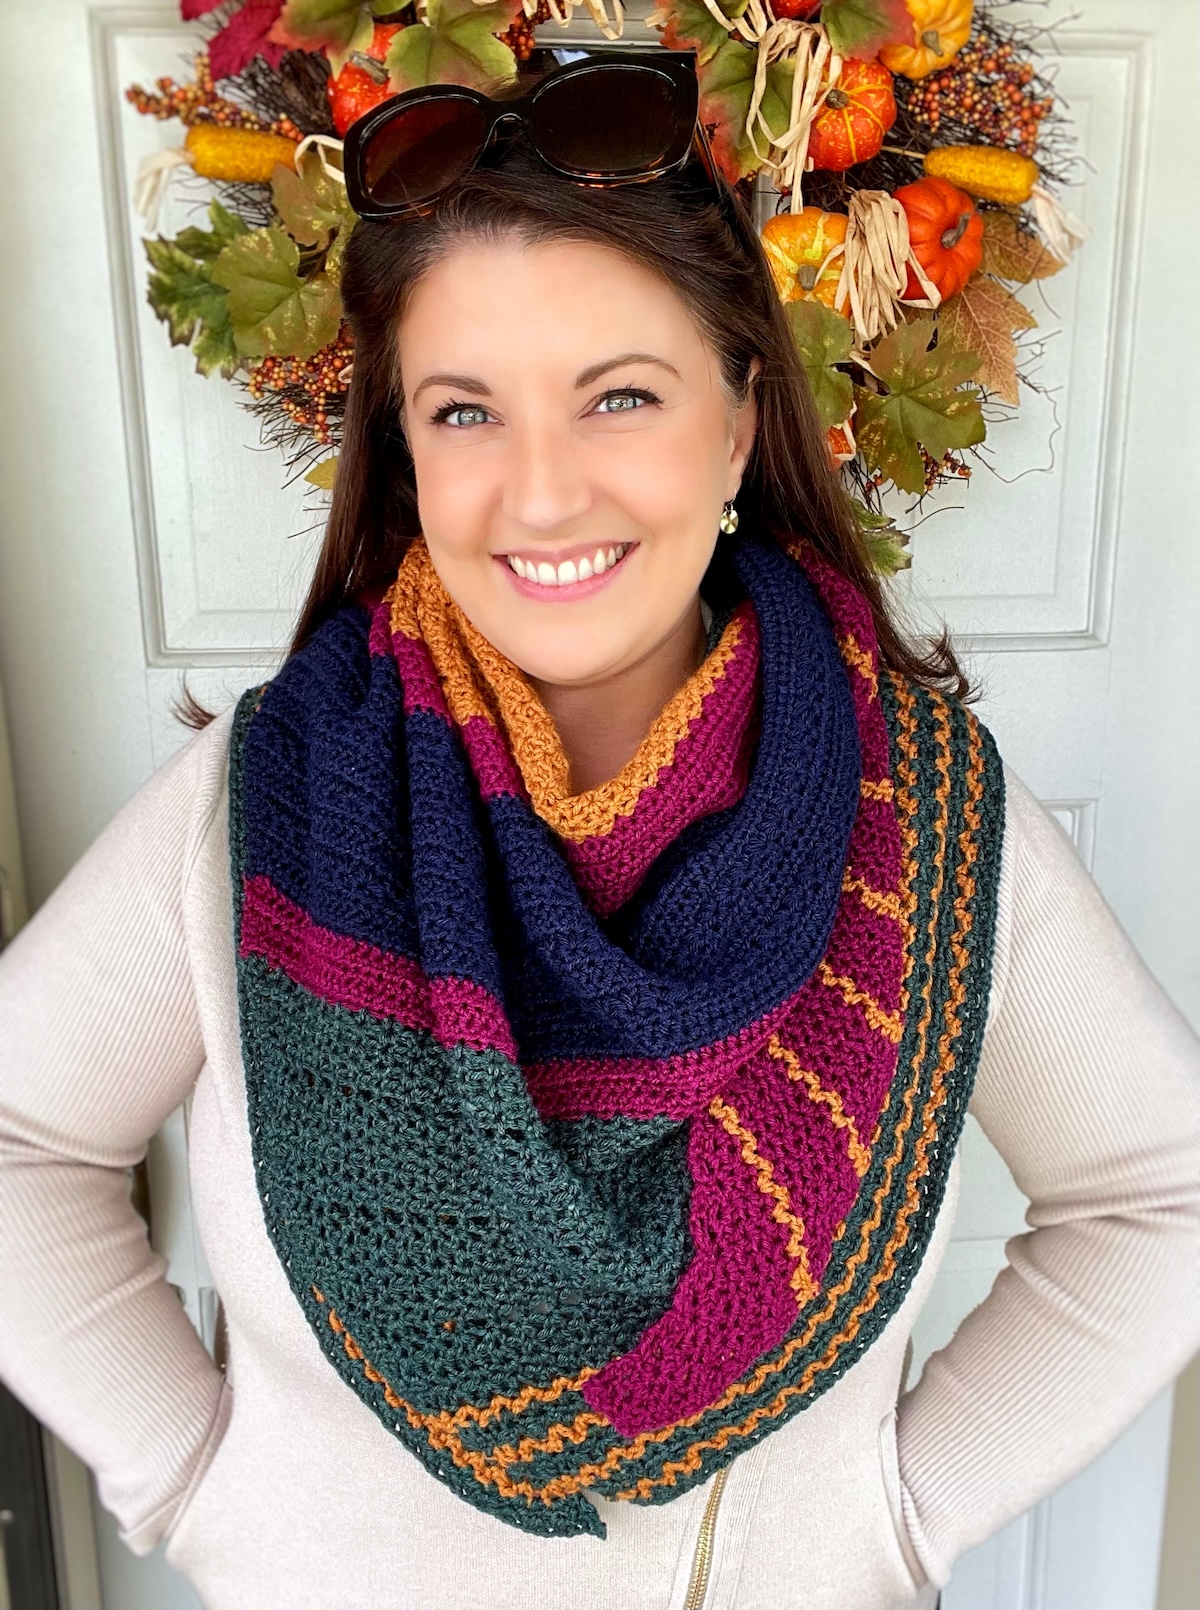
Frozen Fractals Buttoned Cowl – Free and Simple Crochet Pattern
Frozen Fractals Cowl | Don’t let the cold bother you with this Free Crochet Pattern
Although I love the warmer months of the year, I must confess that I feel there’s something extra romantic about winter. Snuggled up in the evenings with a glass of red in front of a roaring fire, or out walking in a snowy winter wonderland, I always eagerly anticipate the arrival of the festive holiday season!
*Disclosure: This post contains affiliate links, and at no additional cost to you, I may earn a commission if you decide to make a purchase after clicking through the link. Please see my Privacy Policy for full details. Thank you for supporting Tales of Knots!
The Design
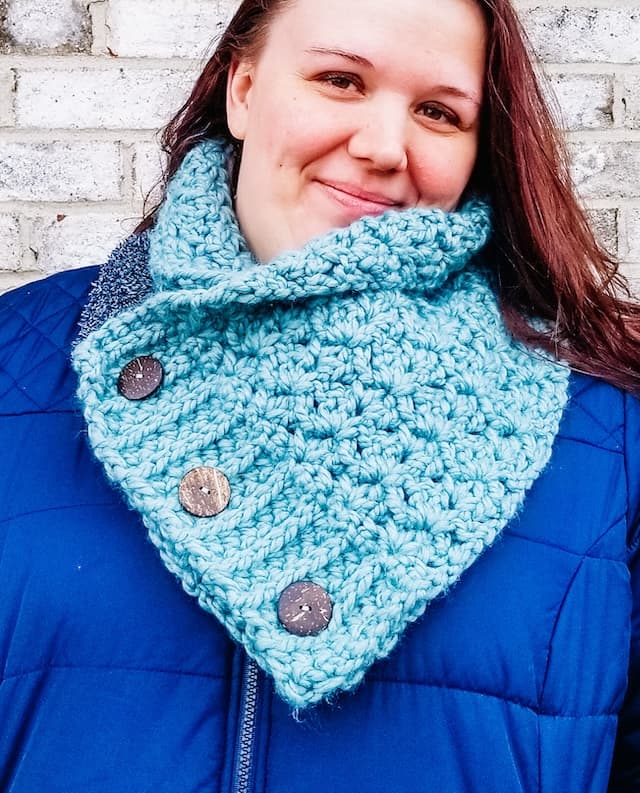
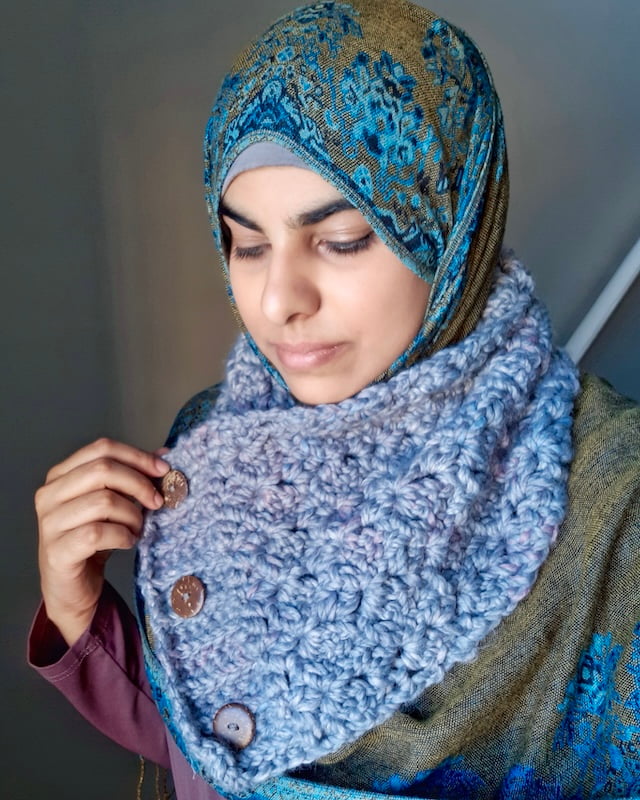
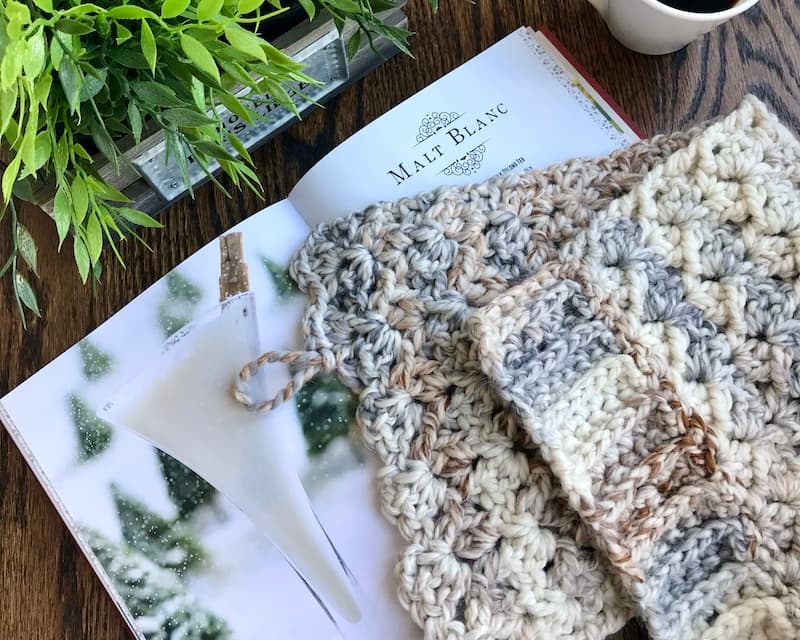
But what if ‘the cold DOES bother you anyway’? I’m one of those that always feels Jack Frost nipping at my toes, so I designed this thick and cosy crochet buttoned cowl to keep me warm. And if you’re anything like me, this fast and easy make is exactly what you need too! Whether you’re crafting for last minute Holiday gifts, prepping for Christmas Markets or simply enjoying making for yourself, the Frozen Fractals Cowl is sure to be a crowd pleaser!
Crochet Buttoned Cowl Supplies:
Yarn:
Super Bulky (size 6) Lion Brand Wool Ease Thick and Quick in Seaglass
Crochet Hook:
8mm (US L) CroChic Styles ‘Dat Bubbly Drank’ crochet hook
Notions:
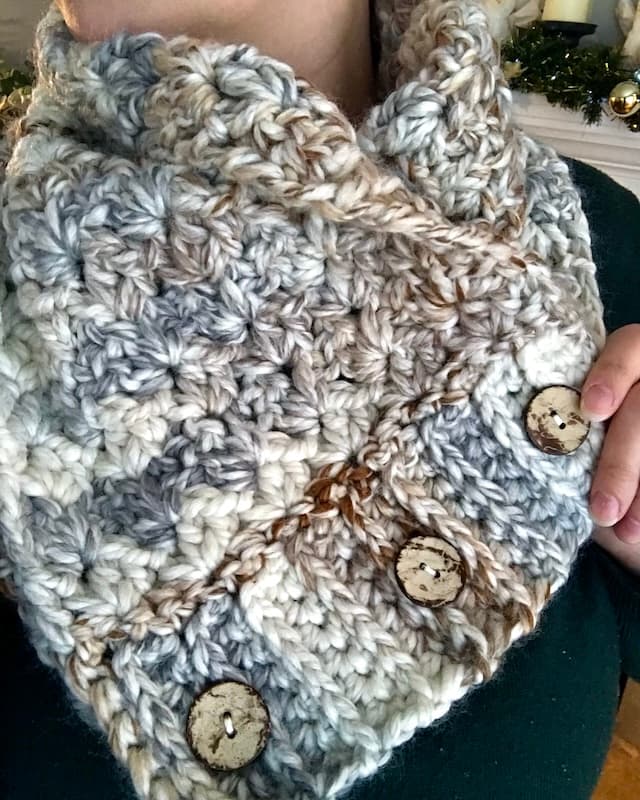
- 3 x 1″ to 1.5″ coconut buttons
- Yarn needle (for weaving in ends)
- Scissors
- Stitch markers (optional)
Gauge:
Ribbing: 12 sts x 8 rows = 4″ (10cm) in ribbing st pattern Body: 3 shells x 5 rows = 4.5″ wide by 4″ high in shell st pattern
Abbreviations:
- Ch(s) = Chain(s)
- St(s) = Stitch(es)
- Sl St(s) = Slip stitch(es)
- Sc = Single crochet
- Sc3L = Single crochet in third loop (See special stitches)
- Hdc = Half double crochet
- Dc = Double crochet
- Shell = (2 dc, ch 2, 1 sc) all worked into the same space
- Sk = Skip the specified st
- RS = Right side
- WS = Wrong side
- (#) = Number of sts per row
Skill Level:
Easy – Advanced Beginner
Yardage
Approx 174 yards (2 x 5oz skeins) for Adult Medium
Finished Measurements
Adult Medium: 37 inches long by 9.5 inches wide (Instructions are also given within the pattern for customisation options)
Special Stitches
Working in 3rd Loop: When working a half double crochet stitch, the yarn over before inserting the hook creates a ‘third loop’ behind the back loop of the top ‘V’ of the finished stitch. This loop is where you work into in the following row. (This will be on the front as you work. Grab your copy of the pdf for full photo tutorials.)
Back Loop/Bump of Chain Row: Holding a foundation chain row straight, the top loop and bottom loop are visible. Angling the top of the chain slightly towards you, the ‘back loop/bump’ is visible behind.
Crochet Buttoned Cowl Pattern Notes:
Pattern is written in US terms.
Ch 1 at the beginning of a Ribbing row does not count as the first stitch.
Chs at the beginning of a Body row do count as the first stitch.
[ ] = Instructions within brackets are worked the total number of times specified.
( ) = Work stitches between parentheses into the same space.
Where there are no st counts listed, the numbers are the same as the previous row.
Customisation
To customise your cowl for a looser or more snug fit, simply add or remove Body rows in multiples of two.
Crochet Buttoned Cowl Pattern Instructions:
Ribbing, with Button Holes
Ch 8
Row 1 (WS): Sc in back loop/bump of second ch from hook and each st across to end. (7)
Row 2 (RS): Turn, ch 1, 1 hdc in first st and each st across.
Row 3 (WS): Turn, ch 1, 1 sc3L in each of first 3 sts. Ch 1, sk 1, 1 sc3L in each of next 3 sts.
Row 4 (RS): Turn, ch 1, 1 hdc in each of first 3 sts. 1 hdc around ch space. 1 hdc in each of next 3 sts.
Row 5 (WS): Turn, ch 1, 1 sc3L in first st and each st across.
Row 6 (RS): Turn, ch 1, 1 hdc in first st and each st across.
Rows 7-8: Repeat Rows 5-6.
Row 9: Repeat Row 5.
Row 10 (RS): Turn, ch 1, 1 hdc in each of 3 first sts. Ch 1, sk 1, 1 hdc in each of next 3 sts.
Row 11 (WS): Turn, ch 1, 1 sc3L in each of first 3 sts. 1 sc3L in back loop of ch, 1 sc3L in each of next 3 sts.
Row 12: Repeat Row 6.
Rows 13-16: Repeat Rows 5-6.
Rows 17-19: Repeat Rows 3-5.
Turn your work 90 degrees so that you are now working into the row ends, with WS facing.
Body
Row 1 (WS): Ch 1 (counts as first st). Beginning in the last row of ribbing just completed, 1 sc in the end of each ribbing row across. (20)
Row 2 (RS): Turn, ch 2, sk 1, [(2 dc, ch 2, 1 sc) in next stitch (referred to as shell hereafter), sk 2] 6 times. Sk 1, 1 dc in top of turning ch. (6 shells, 2 dc)
Row 3 (WS): Turn, ch 2. 1 shell in first ch space and each ch space across. 1 dc in top of turning ch.
Row 4 (RS): Turn, ch 2. 1 shell in first ch space and each ch space across. 1 dc in top of turning ch.
Rows 5-33: Repeat Rows 3-4.
Row 34 (RS): (Working into the individual sts of the shells below) Turn, ch 2 (counts as turning ch and first hdc) [1 hdc into the sc of row below, 1 sc into ch space, 1 hdc into next dc, sk next dc] Repeat […] across each shell. 1 hdc in top of turning ch. Turn to WS facing. (20)
Turn your work 90 degrees, with WS facing.
Ribbing (at end)
Ch 8.
Row 1 (WS): 1 sc in second ch from hook and in each of next 6 chs. 1 sl st into each of next 2 sts along Body edge. (7)
Row 2 (RS): Turn, ch 1, 1 hdc in first st and each st across.
Row 3 (WS): Turn, ch 1, 1 sc3L in first st and in each st across. 1 sl st into each of next 2 sts along Body edge.
Rows 4-17: Repeat Rows 2-3.
Row 18: Repeat Row 2.
Row 19: Turn, ch 1, 1 sc3L in first st and in each st across. 1 sl st in last st along Body edge.
Finish off and weave in ends.
Finishing your buttoned cowl
Laying the cowl out wrong side facing, fold both of the short ends in to the middle and overlap. Make note of where the buttonholes are and attach 3 buttons to the right side of opposite end of cowl.
That’s it!
I’d love to see your finished makes! Please tag me on your favourite social media platform using @talesofknots and #frozenfractalscowl so that I can see and share your lovely crochet buttoned cowl!
I hope you enjoyed making this pattern, and please don’t hesitate to reach out to me if you have any questions.

Need any help with this pattern?
Submit your question in our contact form below!


One Comment