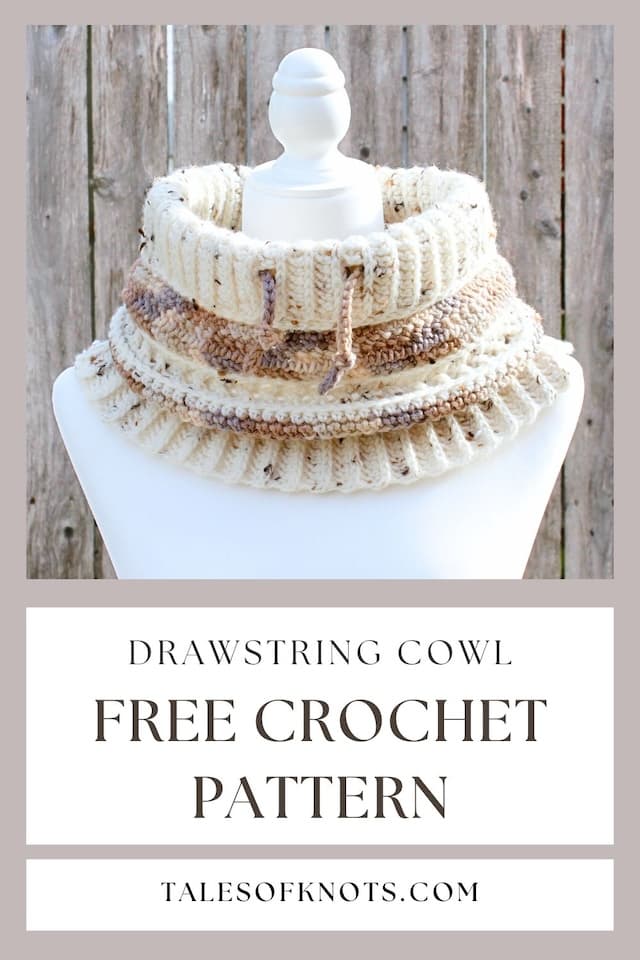
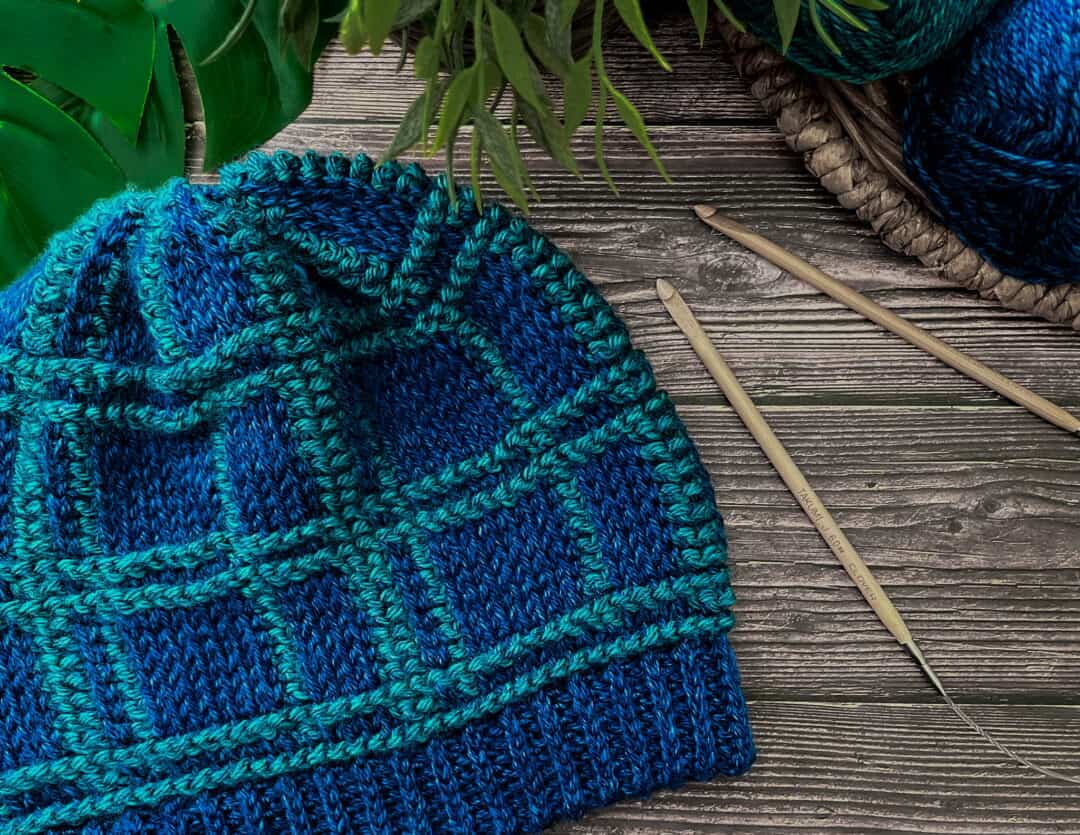
Persinette Drawstring Cowl – Bundle Up in this Free Crochet Pattern
Persinette Drawstring Cowl | Adventurous Beginner Crochet Pattern
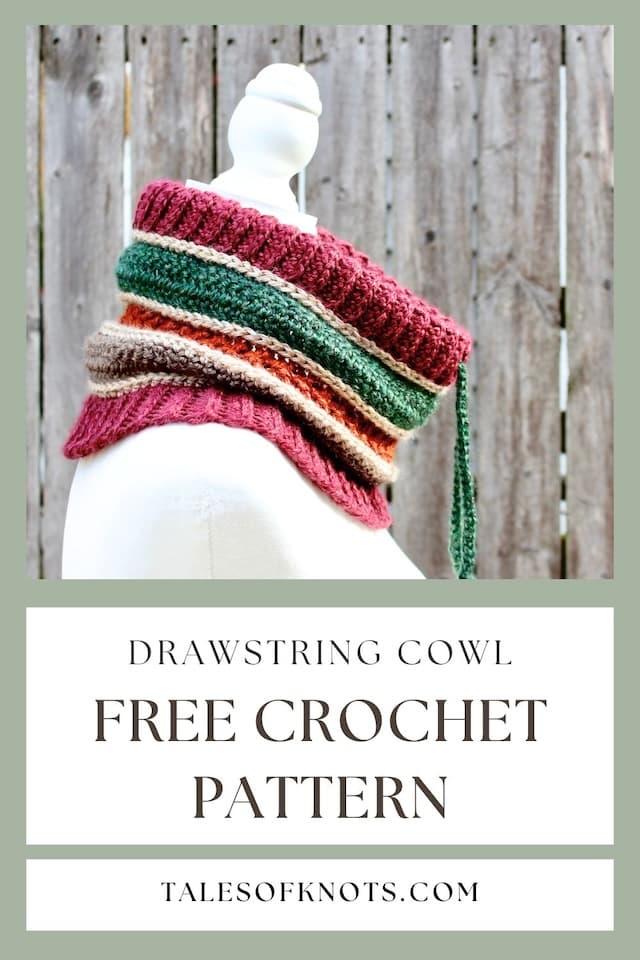
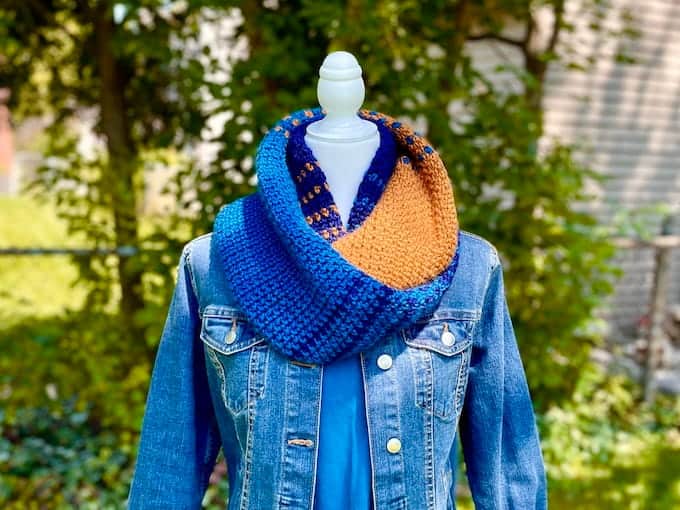
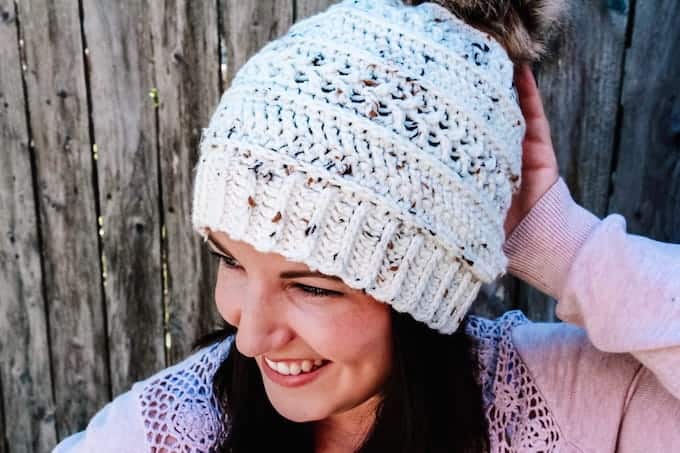
Who doesn’t love a matching set?! Ever since I designed the Persinette Beanie, I knew that I was going to need another winter accessory to match it. But I was not a fan of cowls previously; don’t they have a tendency to end up in a rather useless heap around your shoulders? Could I design a cowl with more structure, that showed off the texture, and could actually keep my neck warm? Enter the Persinette crochet drawstring cowl!
*Disclosure: This post contains affiliate links, and at no additional cost to you, I may earn a commission if you decide to make a purchase after clicking through the link. Please see my Privacy Policy for full details. Thank you for supporting Tales of Knots!
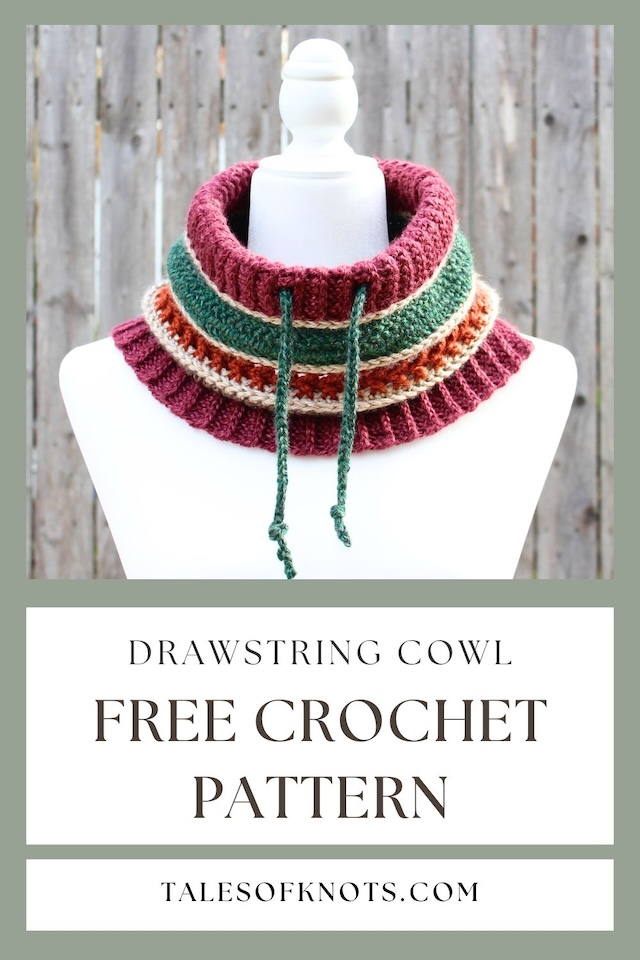
This is the accessory I didn’t know I’d always needed! The drawstring design is the perfect solution to my problem with neck warmers previously; the doubled-over top brim and drawstring closure gives it an extra level of structure and coziness, while the split lower ribbing lets it sit comfortably and stylishly on your shoulders, showing off all that gorgeous texture! And don’t worry, there isn’t an I-cord in sight!
Choosing your Yarn:
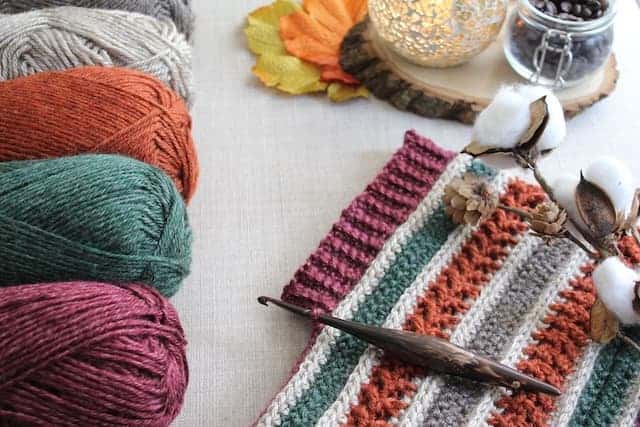
Lion Brand Heartland is one of my favourite worsted acrylic yarns, with its heathered shades and generous yardage per skein. It comes in a variety of earthy and jewel-toned colours, and you’re always sure to find the perfect shade for your project. I had a lot of fun playing around with the colour palette for the stripes I knew I wanted to incorporate in this design; trying to get the perfect combination that reminded me of my favourite season, without simply being shades of orange! The featured sample uses Badlands, Grand Canyon, Mammoth Cave, King’s Canyon, and Yosemite.
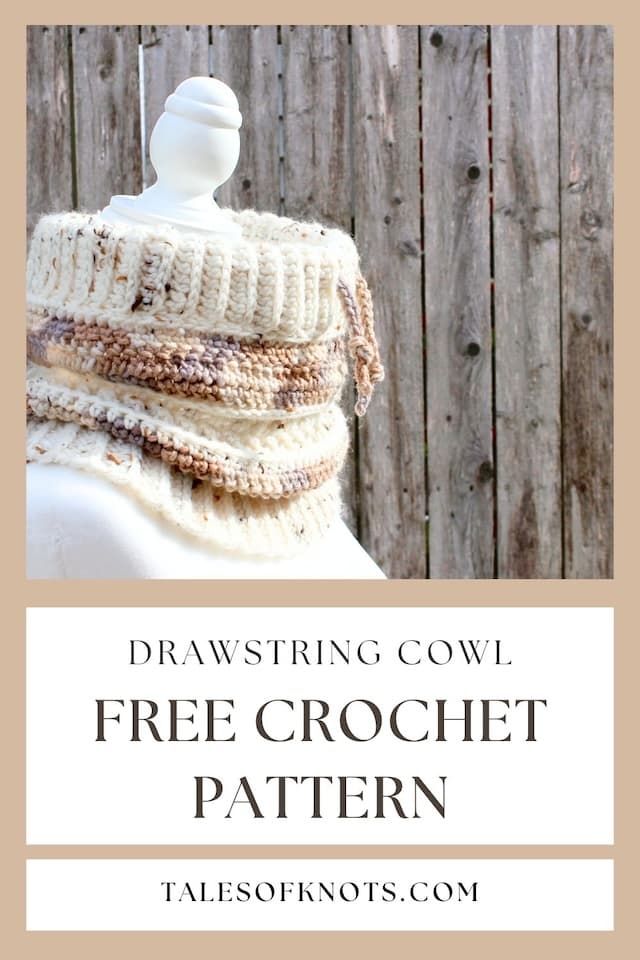
I’ve made two so far, the second to match my Persinette Beanie, using Loops ands Threads Impeccable yarn in Aran Tweed and Toasted Almond. And I’m already planning my next one as the colour possibilities are endless! This time, I think I’ll use Furls Wander; a medium worsted, 100% acrylic yarn from Furls Crochet. It comes in 100g bullet skeins of 120 yards, available in 52 gorgeous colours, and has quite simply a beautiful softness and sheen that make it perfect for this cozy crochet drawstring cowl! Click to read my full review of Furls Wander yarn.
Yarn Substitutions
Below are some of my recommendations for other yarns that would work really well in this pattern, and they come in tons of colours!
- Brava Tweed, 97% premium acrylic, 3% viscose, worsted
- Wool of the Andes Superwash, 100% superwash wool, worsted
- Swish, 100% fine superwash Merino wool, worsted
- Comfy, 75% Pima cotton, 25% acrylic, worsted
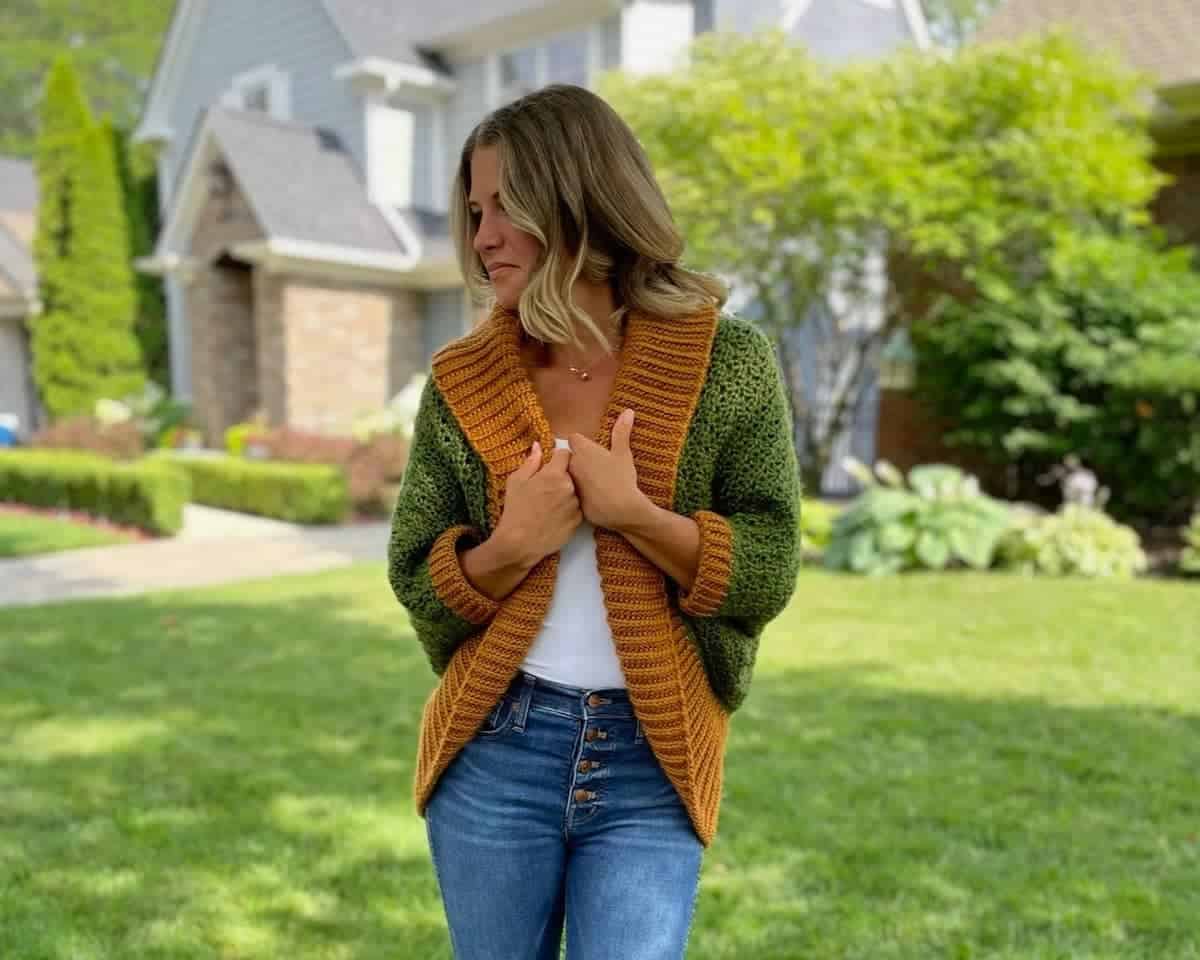
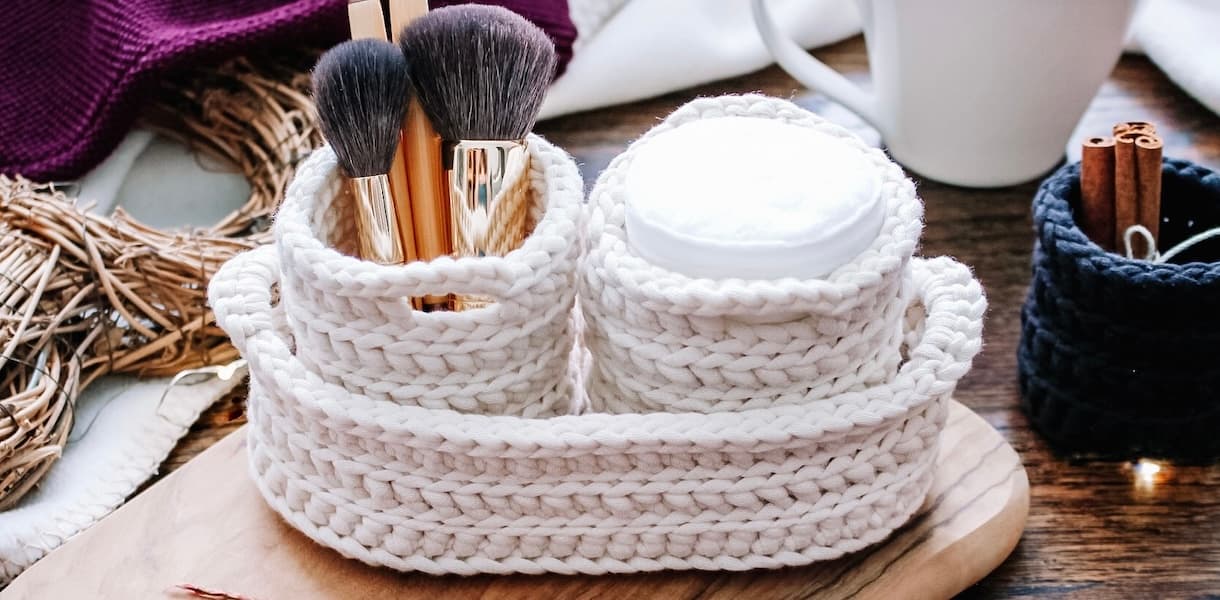
Like this pattern? Checkout these other free patterns here on the blog:
Persinette Drawstring Cowl Supplies:
Yarn:
- Medium worsted (size 4) Lion Brand Heartland or Furls Wander acrylic yarn in as many colours as you like! See Finished Measurements section for yardage.
Crochet hooks:
- 4.5mm (US G+) and 5.5mm (US I-9) Furls crochet hooks
Notions:
- Yarn needle (for weaving in ends)
- Scissors
- Safety Pin, or paperclip (for threading drawstring)
- Furls Lucet Fork (optional, in place of faux I-cord)
Skill Level:
- Intermediate
Gauge: 4×4 in / 10×10 cm
- 4.5mm (US G+) hook = 19 sts x 13 rows in ribbing stitch pattern
Abbreviations:
- 3L = work in the third loop of stitch below
- BXdc = back cross double crochet
- ch(s) = chain(s)
- dc = double crochet
- FXdc = front cross double crochet
- HBdc = herringbone double crochet
- HBhdc = herringbone half double crochet
- hdc = half double crochet
- inv sl st = invisible slip stitch
- RS = right side
- sc = single crochet
- sk = skip
- sl st = slip stitch
- st(s) = stitch(es)
- WS = wrong side
- Yo = yarn over
Finished Measurements:
| Size | Circumference | Height | Yardage |
|---|---|---|---|
| Youth | 24″ | 7.5″ | 234 yds |
| Medium | 26″ | 9″ | 305 yds |
| Large | 28″ | 10″ | 365 yds |
Special Stitches:
Working in third Loop (3L) – When working a half double crochet stitch, the Yo before inserting the hook creates a ‘third loop’ behind the back loop of the top ‘V’ of the finished stitch. This loop is where you work into in the following row. (This will be on the front as you work the Brim and WS Body rows, however this will be on the back as you work RS Body rows.)
Invisible slip stitch – Extend the working loop on your hook, and remove your hook. Insert the hook from back to front under the top two loops of the first stitch of the round. Place your working loop back on your hook and pull through to the back. Tighten the stitch.
Herringbone half double crochet – Yo, insert your hook into the next stitch and pull up a loop. Pull the first loop now on your hook through the second loop. (Holding the bottom of the stitch while you do this makes it easier.) YO and pull through two loops.
Herringbone double crochet – Yo, insert your hook into the next stitch and pull up a loop. Pull the first loop now on your hook through the second loop. Yo, pull through one loop, Yo and pull through two loops.
Front cross double crochet (modified X-stitch) – Yo, and crossing your hook in front of the dc just worked, insert your hook from back to front into the skipped st. Yo on the front of your work and pull up a loop. Yo and pull through two loops, Yo and pull through two loops.
Back cross double crochet (modified X-stitch) – Yo, and crossing your hook behind the dc just worked, insert your hook from front to back into the skipped st. Yo and pull up a loop. Yo and pull through two loops, Yo and pull through two loops.
Persinette Cowl Pattern Notes:
Pattern is written in US terms.
Chains at the beginning of a row/round do not count as the first stitch.
[…] = Instructions within brackets are worked the total number of times specified.
Where there are no stitch counts listed, the counts are the same as the previous row/round.
If using multiple colors, the new color is added on the yarn over that completes the joining slip stitch of the previous row.
Color changes for two colors, as per cream and brown sample, are given within the written pattern as A and B. For more color change options, please refer to the Row Tracker in the premium pattern PDF.
Ribbing is worked in turned rows first and joined at one st only to form a band, with split hem. It is then turned 90 degrees to continue working the body in joined rounds into the ends of the ribbing rows.
Pattern instructions are written first for Small, with (Medium, and Large) in parentheses.
Customization:
Weight 4 encompasses many different yarns, including Medium worsted and Aran, a heavier worsted. If you are having difficulty meeting gauge, simply select your preferred hook sizes for your yarn (a smaller hook for ribbing and the next size up for body) and follow the customization instructions: the body pattern is worked in multiples of 2+1 sts. If you desire a more fitted or looser cowl, work as many ribbing rows as needed until your desired circumference +2 inches, (ensuring you have an odd number of rows), and then continue with the body, following the relevant instructions for your desired height.
Persinette Drawstring Cowl Pattern Instructions:
And that’s it! Congratulations on your new super cozy drawstring cowl, I hope you enjoyed this pattern!
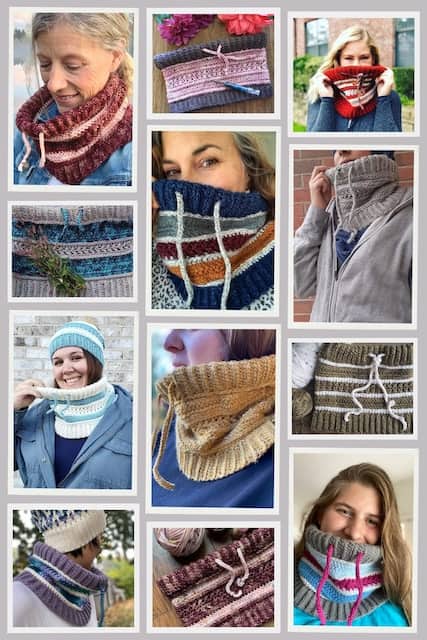
Persinette Tester Versions:
Take a look at some of the beautiful color combinations my amazing testers came up with for this pattern!
I’d love to see your finished drawstring cowl! Please tag me on your favourite social media platform using @talesofknots and #persinettecowl so that I can see and share your lovely makes!

Need any help with this pattern?
Submit your question in our contact form below!

One Comment