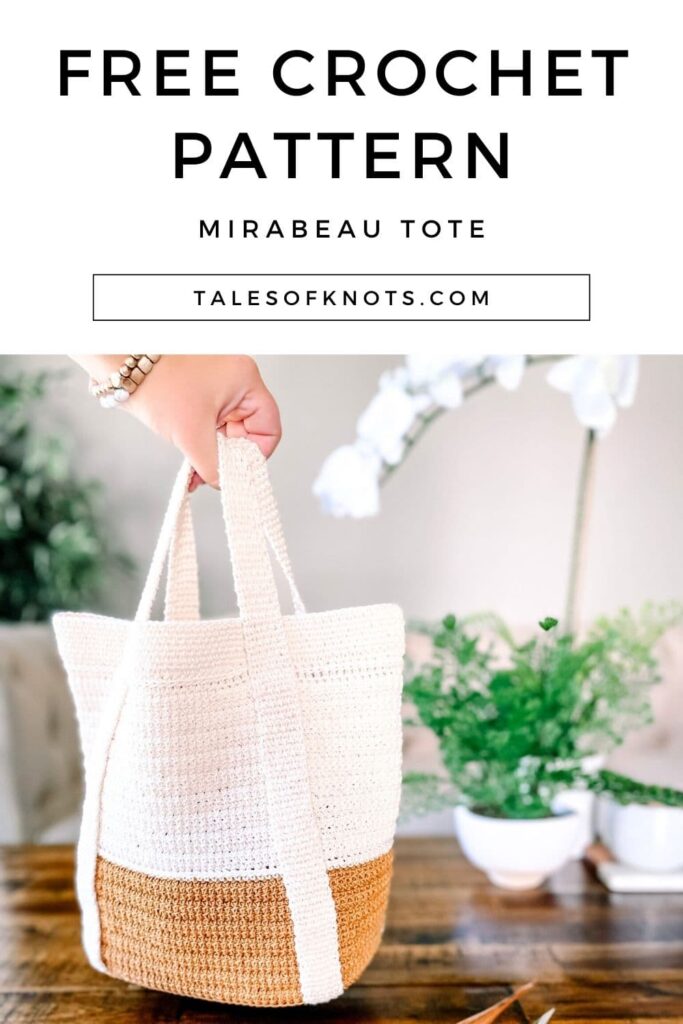
Mirabeau Free Crochet Tote Pattern – With My Secret To Sturdy Bases!

Mirabeau crochet tote bag in cream and mustard, held over a coffee table with yarn and hook nearby, near open french windows

Add a Provençal Flair to your outfit with the Mirabeau Tote | Crochet Pattern

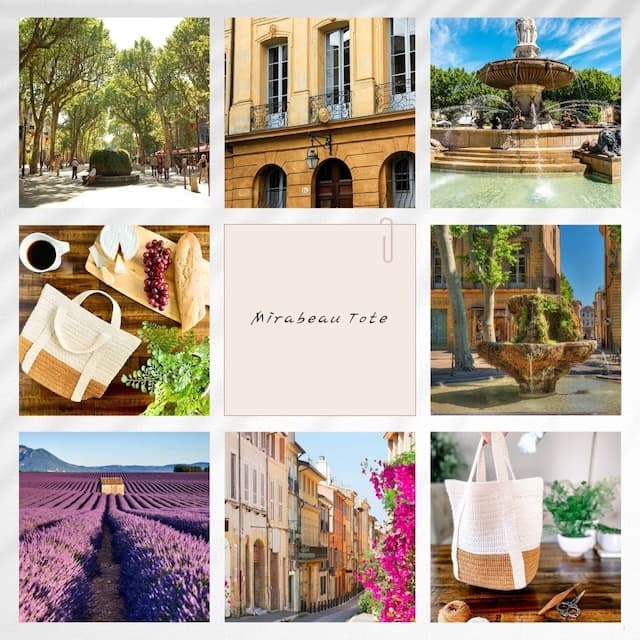
In my early 20’s I was fortunate to live for a short while in a tiny one-bedroom apartment above a Jazz club in the quaint but busy town of Aix-en-Provence, in the South of France. I spent many afternoons strolling around the streets, stopping for coffees in the little cafés, admiring the architecture of the fountains and squares off the ‘Cours Mirabeau’ (pronounced Meera-bo) and, of course, people watching! The crisp horizontal lines and colors of the Mirabeau Tote transport me straight back to that time, reminding me of the buildings and street corners, and is the perfect accessory to add to your summer wardrobe!

Mirabeau crochet tote bag in cream and mustard, sitting upright on a coffee table with yarn and hook nearby
Mirabeau Crochet Tote
Collage of photos of Aix en Provence, in the South of France
Aix-en-Provence, France

The Yarn

The Mirabeau Crochet Tote pattern is made with We Crochet Curio #3 Thread. It is made from 100% mercerized cotton, and comes in 100g balls of 295 yards. The choice of cotton makes this project really durable and strong, while also easy to wash and launder, and the mercerized aspect of the cotton makes the yarn stronger, smoother to work with and gives a subtle shine. Another benefit to mercerized cotton is that it is less likely to shrink when being washed, and it also helps the fibers to take dye better. This means that each ball of Curio #3 is really saturated with bright, vibrant color.

The Hook

For this design I used my Wooden Streamline crochet hook from Furls Crochet, in the material Camwood. The wood of the hook worked really well with this smooth cotton thread without slipping too much, and this helped me to make my stitches tighter. If you find it difficult to work with cotton, I suggest trying out a few different hook types and materials until you find the perfect hook that works with your crochet style.

Crochet Tote Pattern Supplies

Yarn:

  • Crochet Thread #3 (or Laceweight yarn) in 2 colors: sample uses We Crochet Curio #3 in Turmeric (color A) and Bare/Natural (color B).

Yardage:

  • Color A (Turmeric): 236 yards (1 ball)
  • Color B (Bare/Natural): 354 yards (2 balls)

Crochet Hook:

Notions:

Skill Level:

  • Intermediate, designed to elevate your crochet skills. The pattern uses linked treble crochet stitches and center single crochet stitches. Full written descriptions of the stitches are below. – Need help? Join the Tales of Knots Facebook Group to ask any questions!

Gauge: 4×4 in / 10×10 cm

  • 21 sts x 22 rounds in single crochet (for the Base)
  • 21 sts x 8 rounds in linked treble crochet (for the Sides)
  • 21 sts x 26 rounds in centre single crochet (for the Handles)

Abbreviations (US crochet terms):

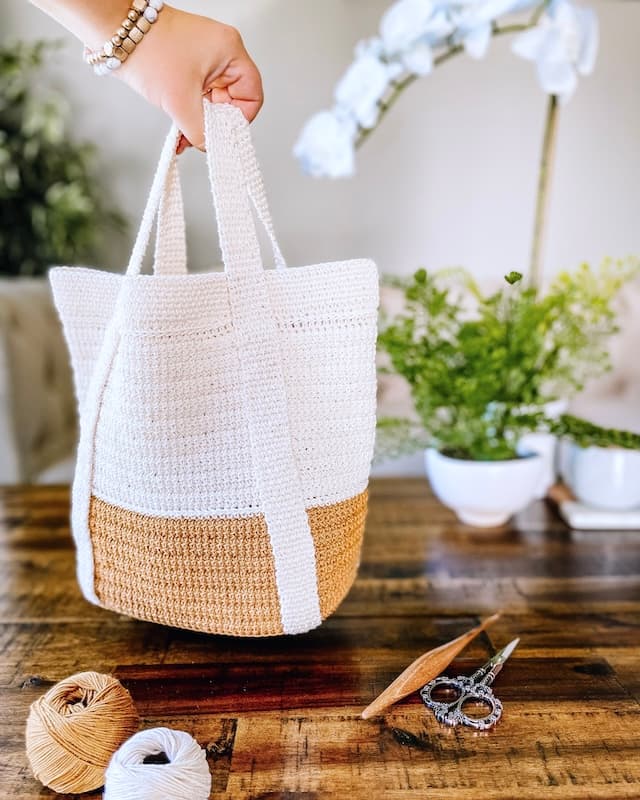
Finished Measurements:

  • Base Width: 4.5″
  • Base Length: 8″
  • Height (minus handles): 10.5″
  • Width (at top): 12.5″
  • Handles: 10″ (31″ total length including sides of Tote)

Pattern Notes

Pattern is written in US crochet terms.

The Mirabeau Tote has a double-layer base with a sheet of craft plastic sandwiched between, as additional support and added protection for your belongings.

Chain 1 at the beginning of rounds/rows does not count as a stitch.

Instructions within [ ] square brackets are worked the total number of times specified.

Instructions within ( ) parentheses are worked into the same stitch.

Instructions between * * asterisks are repeated the number of times specified.

Gauge is not essential for this pattern, however any difference in gauge will also affect the yardage and finished measurements.

Pattern is written in crochet shorthand; 3sc means to place 3 single crochets in the next stitch, sc 3 means to place 1 single crochet in each of the next 3 stitches.

Special Stitches

Beginning Linked Treble Crochet (beg-ltr): Ch 3, pull up a loop in second ch from hook, pull up a loop in third ch from hook, insert hook in base of st and pull up a loop, [yo, pull through 2 loops] 3 times. Counts as first st.

Linked Treble Crochet (ltr): Insert hook in first horizontal bar of previous ltr and pull up a loop, insert hook in next horizontal bar of previous ltr and pull up a loop, insert hook in next st and pull up a loop, [yo, pull through 2 loops] 3 times.

Center Single Crochet (csc): Insert hook in center of sc of previous round/row, in between the ‘legs’ at the base of the st. Continue to work sc as per normal. A pointed hook rather than a rounded tip will help with this st, as will maintaining a looser tension.

Extended Double Crochet (edc): Yo, insert hook into indicated st, yo and pull up a loop. Yo, pull through 1 loop, [yo, pull through 2 loops] twice.

Mirabeau Crochet Tote Pattern Directions

Base – With Color A, Make 2.

Leaving a 20″ tail before the slip knot, ch 21.

Work in unturned rounds until stated otherwise.

Round 1 (RS): 3sc in second ch from hook, sc 18, 3sc in last ch; rotate to work along underside of ch row, sc 18. Join with sl st to first sc.
(42 sc)

Round 2: Ch 1, *2sc in each of next 3 sts, sc 18; repeat from * once more. Join with sl st.
(48 sc)

Round 3: Ch 1, *[sc 1, 2sc] 3 times, sc 18; repeat from * once more. Join with sl st.
(54 sc)

Round 4: Ch 1, *[2sc, sc 2] 3 times, sc 18; repeat from * once more. Join with sl st.
(60 sc)

Round 5: Ch 1, *[sc 3, 2sc] 3 times, sc 18; repeat from * once more. Join with sl st.
(66 sc)

Round 6: Ch 1, *[2sc, sc 4] 3 times, sc 18; repeat from * once more. Join with sl st.
(72 sc)

Round 7: Ch 1, *[sc 5, 2sc] 3 times, sc 18; repeat from * once more. Join with sl st.
(78 sc)

Round 8: Ch 1, *[2sc, sc 6] 3 times, sc 18; repeat from * once more. Join with sl st.
(84 sc)

Round 9: Ch 1, *[sc 7, 2sc] 3 times, sc 18; repeat from * once more. Join with sl st.
(90 sc)

Round 10: Ch 1, *[2sc, sc 8] 3 times, sc 18; repeat from * once more. Join with sl st.
(96 sc)

Round 11 (squaring the corners): Ch 1, sc 8, *hdc 2, (dc, edc, dc) all in same st, hdc 2*; sc 10, repeat from * to * once, sc 28, repeat from * to * once, sc 10, repeat from * to * once, sc 20. Join with sl st.
(104 sts)

Remove hook and secure live loop with a st marker of one base layer, fasten off the other and weave in the tail. For both base layers: ensuring beginning yarn tail is to the wrong side, insert hook in first ch of initial ch row, beside the slip knot, and pull up a loop. Surface sl st in the center of each ch down the initial ch row. Fasten off and weave in the tail.

Cut a plastic rectangle from the craft plastic sheet that measures slightly smaller than your base. Round off the corners to ensure there are no sharp edges poking through the bag.

Lay both bases together, same side up (right side of one to wrong side of the other.) The right side of the top layer with the live loop remaining will form the outer base, while the wrong side of the bottom layer that has been fastened off will form the inner base. ‘Sandwich’ the plastic rectangle between the two.

Round 12 (joining the layers): Pick up the live loop from Round 11 and work through both base layers: ch 1, sc 11, *(sc, hdc, sc) in corner st;* sc 16, repeat from * to * once, sc 34, repeat from * to * once, sc 16, repeat from * to * once, sc 23. Join with sl st.
(112 sts)

Round 13 (RS): Ch 1, BPsc in each st around. Join with sl st.
(112 sts)

Fasten off, rejoin yarn in a corner st at the beginning of a short side. (This new seam will be hidden behind the handles.) Place 1 st marker in the middle of each short side, to mark where to place your increases in the following rounds, and move markers up each round. (This does not have to be exact.)

Sides

Round 1: Ch 3, beg-ltr in first st, ltr in each st around. Join with sl st.
(112 sts)

Note: The joining sl st will leave a gap in the sts. There are several methods to join the ltr st, however I found all of these methods to leave a visibly protruding seam. My preferred method is to seam the sts closed with the yarn tail after you have finished.

Rounds 2-7: Ch 3, beg-ltr in first st, ltr in each st around, increasing 1 st at each st marker (place 2 ltr in same st). Join with sl st.
(124 sts)

Fasten off color A and weave in ends to close seam. Join color B.

Round 8, with color B: Ch 1, sc in each st around, increasing 1 st at each st marker (place 2 sc in same st). Join with sl st. Remove markers.
(126 sts)

Round 9: Ch 1, BPsc in each st around. Join with sl st.

Rounds 10-18: Ch 3, beg-ltr in first st, ltr in each st around. Join with sl st.

Round 19: Ch 1, hdc in each st around. Join with sl st.

Round 20: Ch 1, BPsc in each st around. Join with sl st.

Begin to work in turned rounds

Round 21: Ch 1, turn to wrong side, sc loosely in each st around. Join with sl st.

Rounds 22-28: Ch 1, turn, csc in each st around (keep tension slightly loose). Join with sl st.

Fasten off color B leaving a long tail, and weave in ends to close seam.

Seaming the linked treble stitches

Thread a yarn needle with your tail, and work your way down the inside of your tote to your final round of linked sts.

Beginning from the wrong side of the tote, bring your yarn needle out at the edge of the last linked st above the first horizontal bar. Insert your needle into the next st (the first of the round), just below the first horizontal bar.

Pull the seam closed enough for the horizontal seam you have just made to match the bars of the previous linked sts. Repeat these steps for each horizontal bar ‘pair’ as you work down the seam.

Fasten off and weave in remaining end.

Handles – With Color B, Make 2.

Ch 6.

Row 1: Sc in second ch from hook and each st across, turn.
(5 sc)

Rows 2-190: Ch 1, csc in each st across, turn.
(5 csc)

Fasten off color B, leaving enough tail for seaming the ends of the handles to the Tote.

Joining the handles

Locate the 3 sts at each corner of Round 12 of the base of the Tote bag. If you are right handed, begin with a corner on the right edge of a long side. If you are left handed, begin with a corner to the left edge of a long side. Using the tail from one end of your first handle, thread a tapestry needle and seam the handle to these 3 corner sts and the next 2 adjacent sts along the long side. Ensuring that the same side of the handle is facing the Tote bag, seam the opposite end of the handle to the last 2 sts along the same long side and 3 corner sts.

Repeat this process with the second handle on the opposite side of the Tote bag.

Locate the center of each shorter side and place a stitch marker on Round 19 of the sides. There should be 62 sts between each marker on both long edges. Place additional ‘handle’ stitch markers 13 sts in from either side of both side center stitch markers. Count 57 rows up the handles from the bottom, on both sides, and join to the ‘handle’ stitch markers you have placed on Round 19. (Alternatively, if gauge is slightly different, measure where the handle meets the marker without being stretched.) With a long length of yarn and your yarn needle, seam these 57 rows of the handle to the sides of the Tote bag, working up one edge, across the width of the handle at Round 19, and down the opposite edge of the handle. Use as many stitch markers as necessary to hold the handle in place, and ensure the seam is worked at least 1 stitch in from either edge so that the edges of the handles are not flattened by the seaming.

Repeat this seam on both sides of the bag. There will be four locations at which the handle is seamed to the sides of the Tote, providing more stability and reducing stretch of both the bag and handles.

Fasten off and weave in all ends.

Sew the magnetic purse clasp to the inside of the bag if using.

That’s it! Congratulations on your newest Tote bag!

Need any help with this pattern?
Submit your question in our contact form below!

Would you like to join my email list? As a valued member of my community you’ll get the latest news, exclusive discounts for my latest patterns and advance notice of tester calls! So just enter your email address in the newsletter sign up form and you’ll receive all of the above, straight to your inbox.

If you have any issues at all, particularly with accessing Ravelry files, please don’t hesitate to reach out to me and I will help you out as soon as possible!

Thanks so much friends, and I hope you enjoy the pattern!

Mirabeau crochet tote bag in cream and mustard, held over a coffee table with yarn and hook nearby
Mirabeau Tote Crochet Pattern

Recommended For You

1 Comment

  1. […] Click here for the pattern download details. […]

Leave a Reply

Your email address will not be published. Required fields are marked *